| INTRODUCTION | DESCRIPTION | HISTORY | USAGE |
Please Click On Any Picture for a Larger Version
 An apertometer is used to measure numerical aperture, abbreviated NA or n.a. NA is the modern term which reflects the resolving power of an objective lens. In other words, the NA of a microscope objective is a measure of its ability to gather light and resolve fine specimen detail at a fixed object distance.
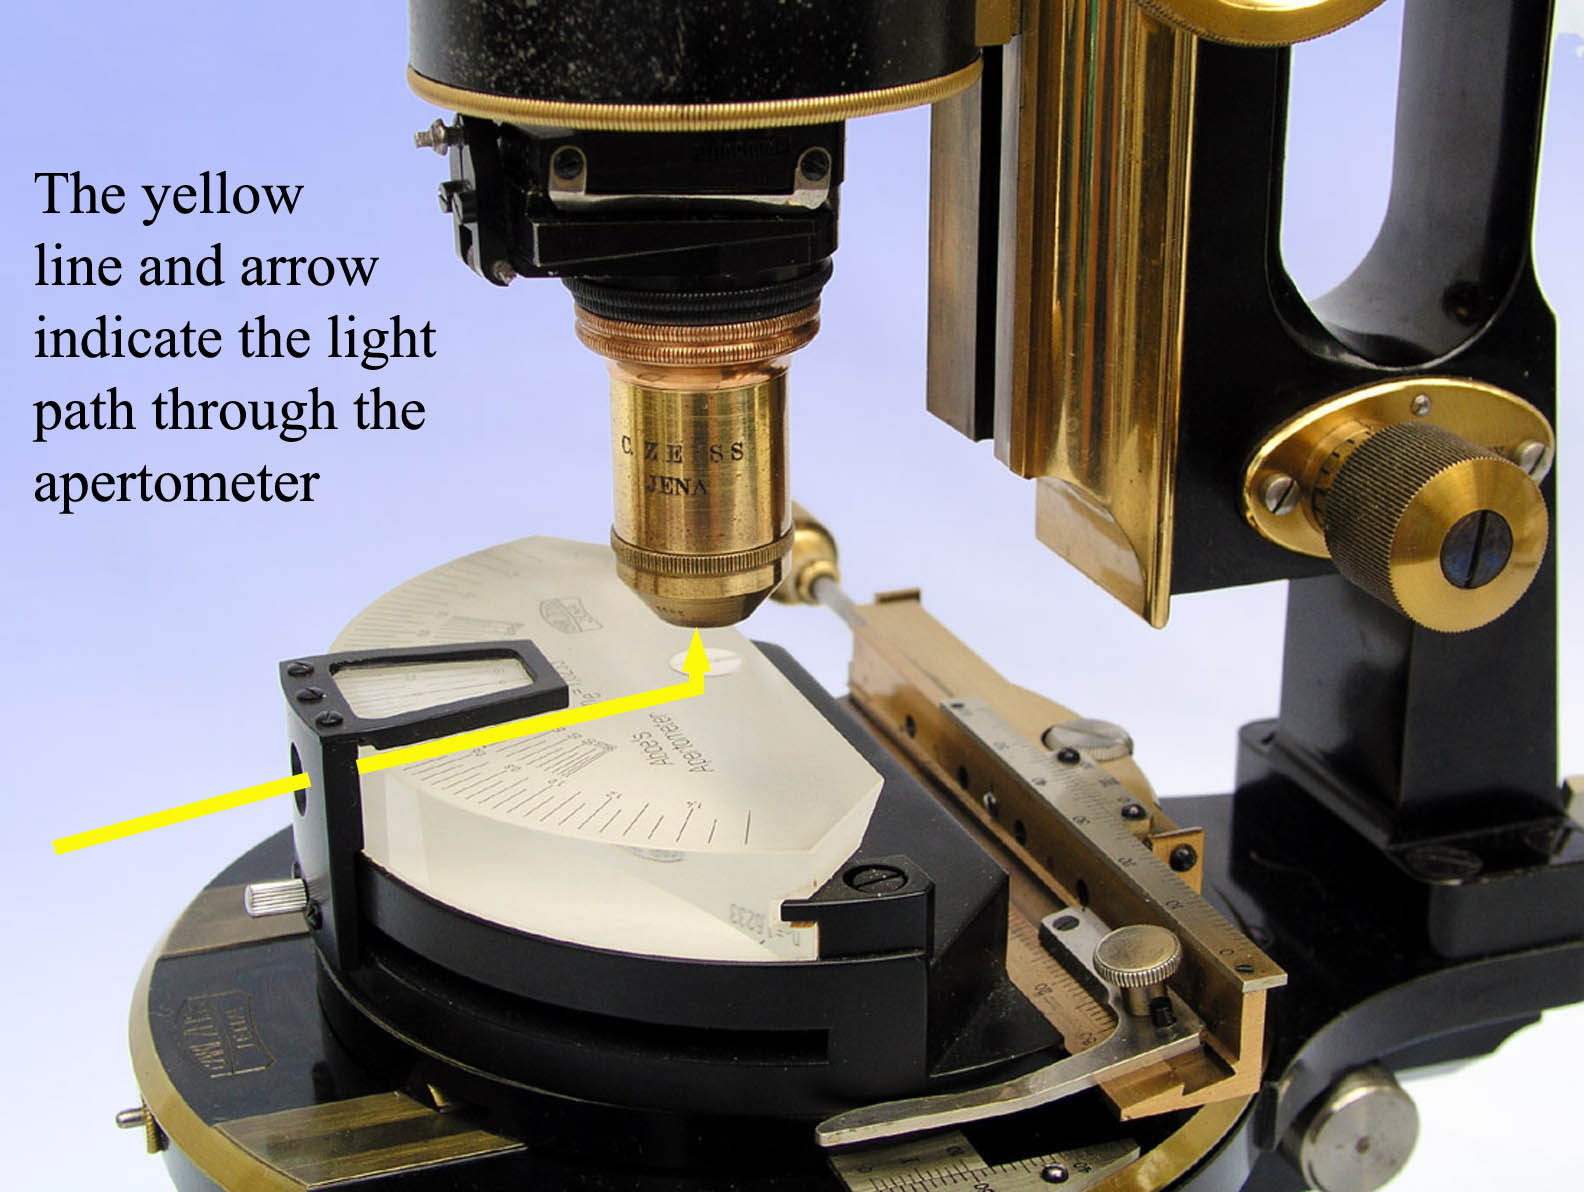
The image to the left shows a later Abbe Apertometer (equipped with a single cursor) in use. A special low power objective(supplied with the Apertometer outfit, not visible in this image), is in place at the bottom of the drawtube, inside the main optical tube. In use in the traditional configuration, as shown in the image to the left, light is directed into the rounded side of the device. The light is directed through the glass slab, and is reflected up through the cover slip and then through the objective. The 45 degree angle of the back of the glass directs the light upwards. The special accessory objective at the end of the drawtube turns the drawtube itself into a microscope to view the back focal plane of the objective being studied. As the cursors are moved around the front of apertometer, their pointers will come into view. A reading is taken from the top surface scale just as the tip of each cursor pointer reaches the field, and the two readings are averaged to obtain the n.a. Most monocular microscopes of the 19th and early 20th century, regardless of maker, had a society thread at the end of the drawtube for accessories. If the drawtube was not equipped with a society thread, it would need to be adapted to accept the special objective. Today it is faster and simpler to use a Bertrand lens or a Phase telescope instead of an objective on a drawtube. The author would like to thank James Solliday for supplying the image of the apertometer on a Zeiss microscope.
An apertometer is used to measure numerical aperture, abbreviated NA or n.a. NA is the modern term which reflects the resolving power of an objective lens. In other words, the NA of a microscope objective is a measure of its ability to gather light and resolve fine specimen detail at a fixed object distance.
The image to the left shows a later Abbe Apertometer (equipped with a single cursor) in use. A special low power objective(supplied with the Apertometer outfit, not visible in this image), is in place at the bottom of the drawtube, inside the main optical tube. In use in the traditional configuration, as shown in the image to the left, light is directed into the rounded side of the device. The light is directed through the glass slab, and is reflected up through the cover slip and then through the objective. The 45 degree angle of the back of the glass directs the light upwards. The special accessory objective at the end of the drawtube turns the drawtube itself into a microscope to view the back focal plane of the objective being studied. As the cursors are moved around the front of apertometer, their pointers will come into view. A reading is taken from the top surface scale just as the tip of each cursor pointer reaches the field, and the two readings are averaged to obtain the n.a. Most monocular microscopes of the 19th and early 20th century, regardless of maker, had a society thread at the end of the drawtube for accessories. If the drawtube was not equipped with a society thread, it would need to be adapted to accept the special objective. Today it is faster and simpler to use a Bertrand lens or a Phase telescope instead of an objective on a drawtube. The author would like to thank James Solliday for supplying the image of the apertometer on a Zeiss microscope. 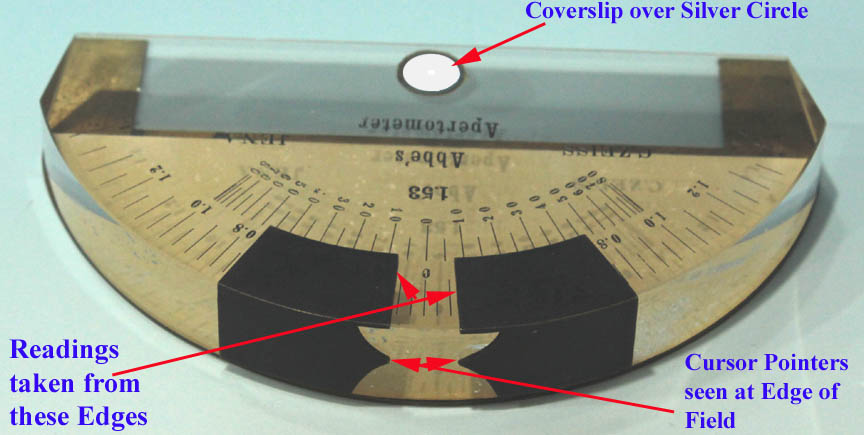
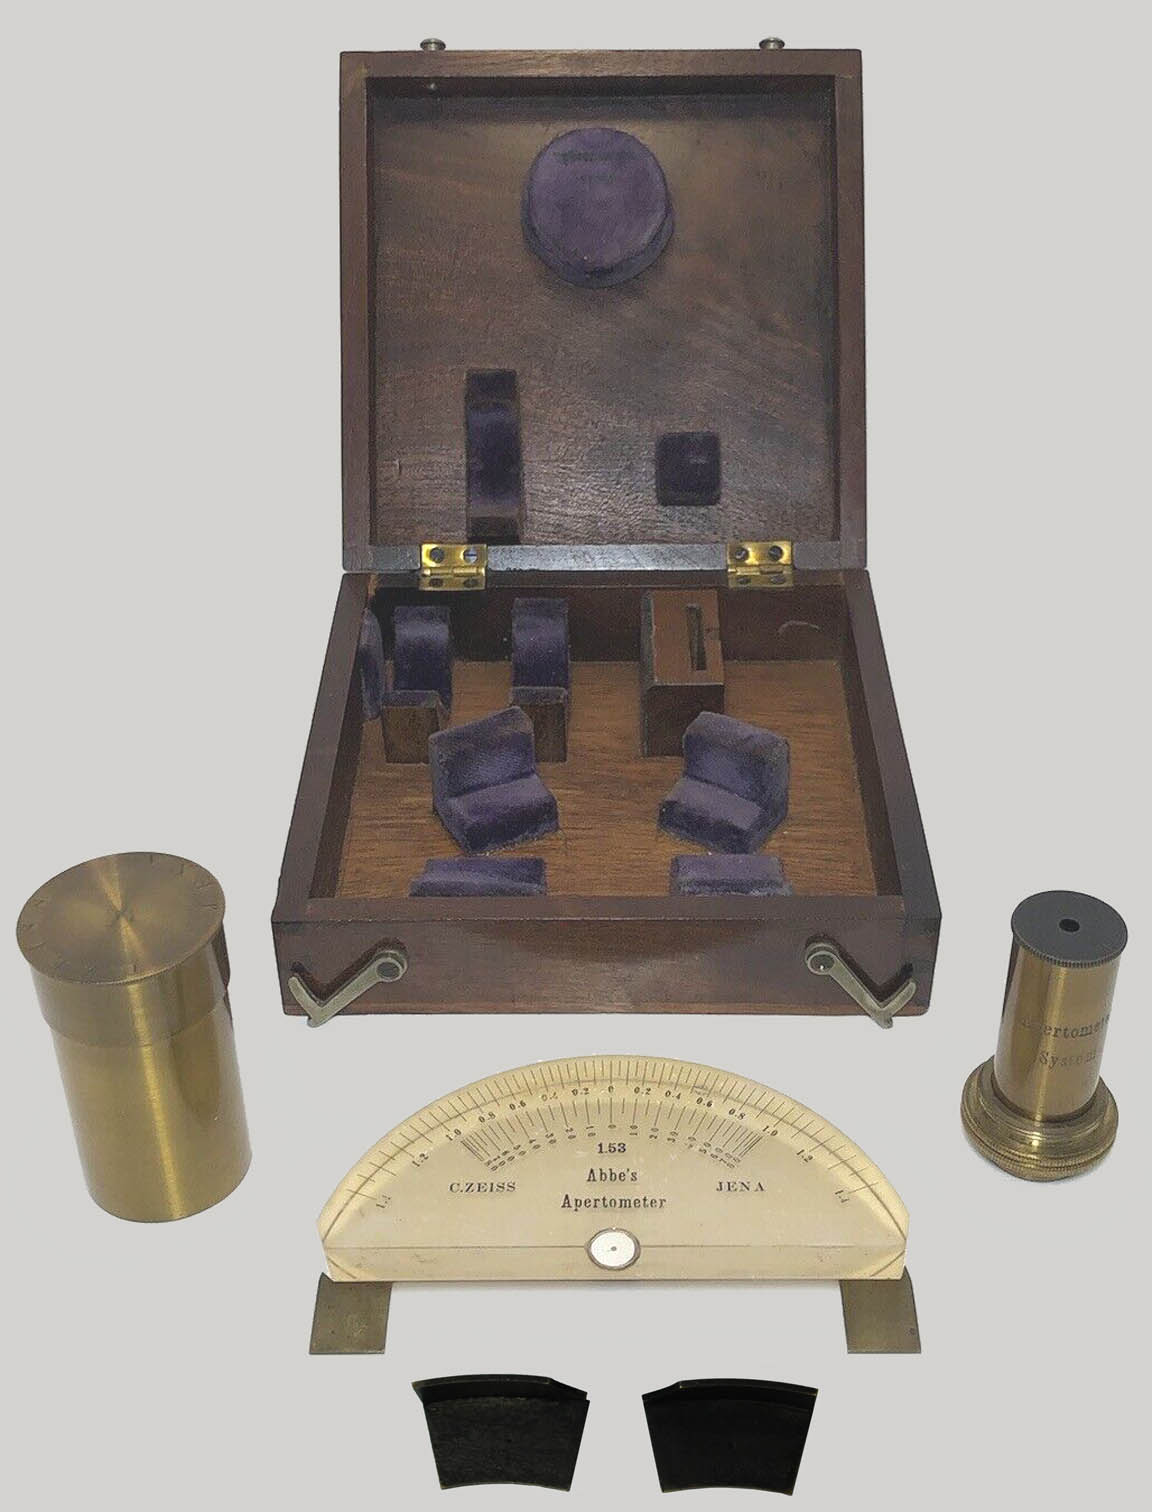
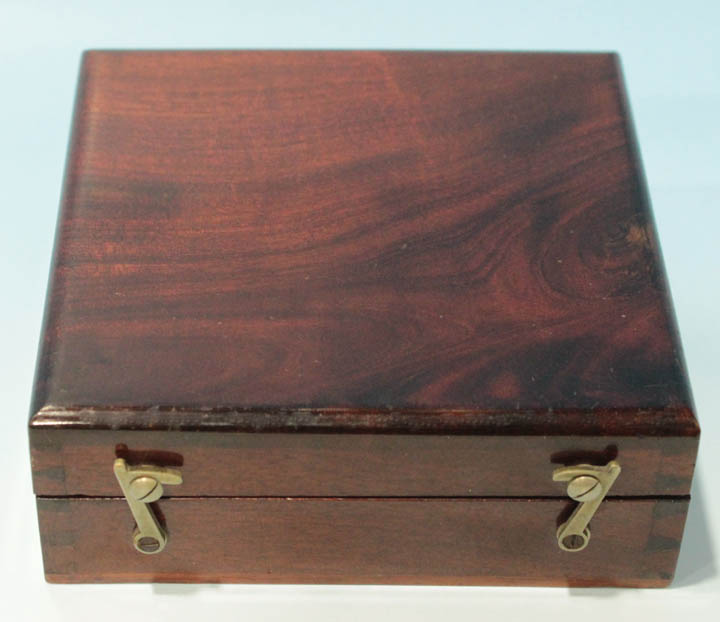
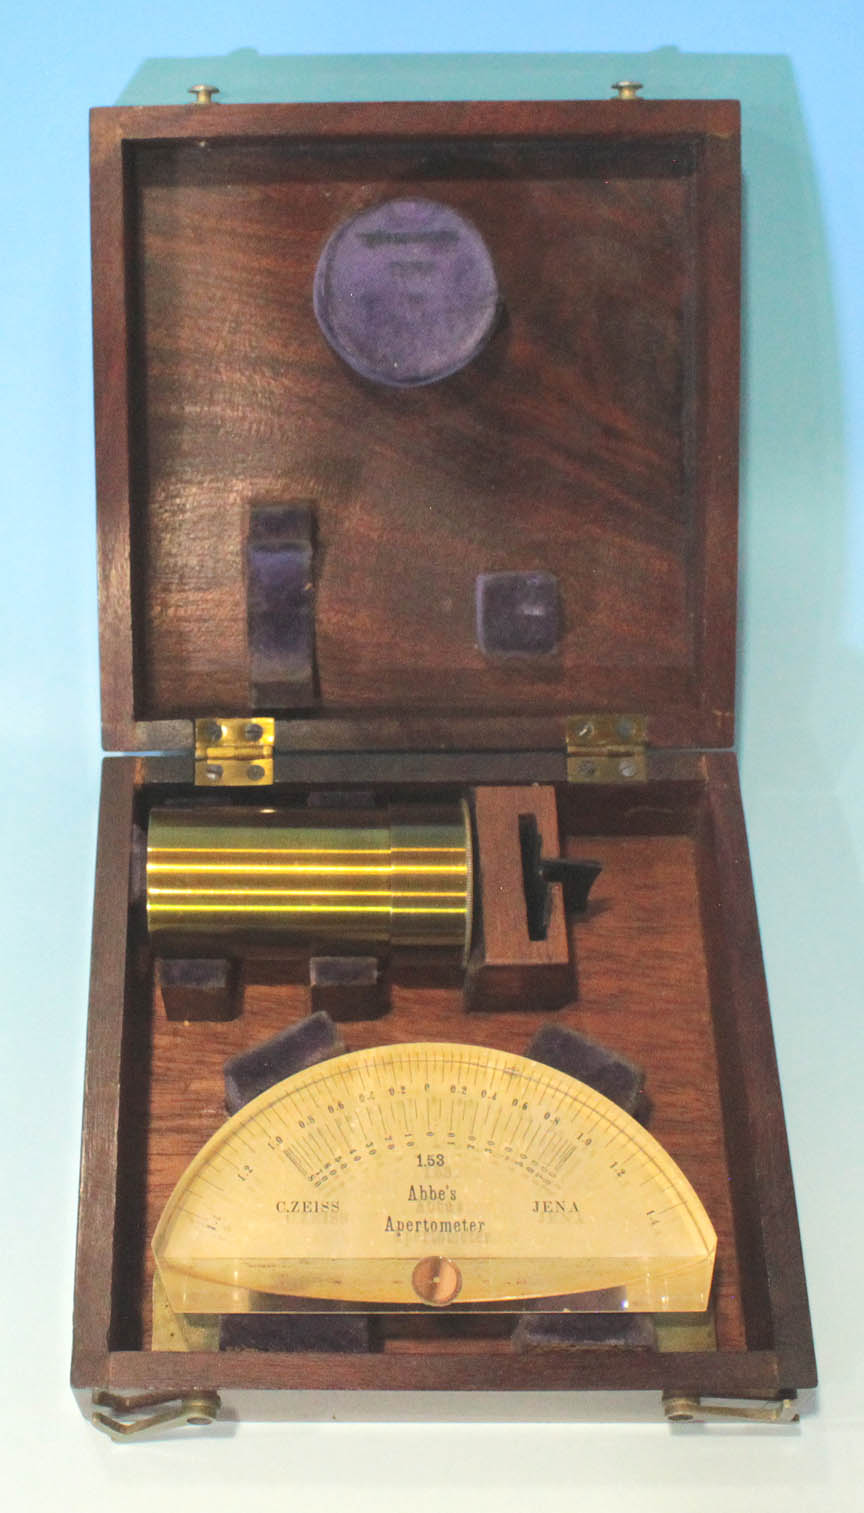
 This apertometer comes in a French Polished fitted mahogany case. The outside dimensions of the case are about 114 x 114 x 40 mm. Inside, the contacting surfaces are covered with bluish-purple felt. Inside is the instrument, two black metal cursors, and the special objective in its can. The can is lacquered brass and labeled
 C. ZEISS JENAon the top of the can. The bottom of the can is labeled
AThe lacquered brass objective is labeled
Apertometer, System.and also
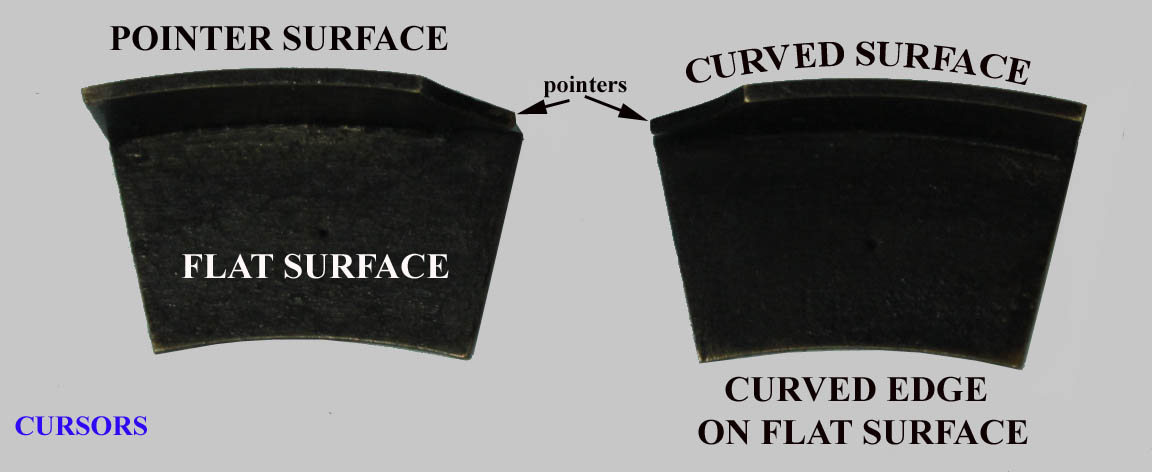
C. ZEISS. The objective has a fixed diaphragm on its distal end. The black cursors are made of black metal, with one curved surface which rides along the curved front surface of the apertometer and has a pointed edge, while the flat surface rides along the top, the edge indicating the reading of the n.a. when the pointer as it enters the field of aperture. The cursors are placed with their flat sides against each other, forming a 'T' to store in T-shaped compartment in the case.
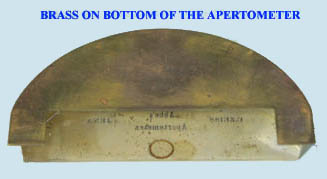 The bottom of the glass slab is cemented to a brass plate with two tabs protruding towards the back, which, having squared off rather than rounded edges, allow the apertometer to be secured by a modern mechanical stage or, presumably, allow clamping to the stage of the microscope. The metal support measures about 114 x 65 mm in maximal dimensions and is about 0.5 mm thick.
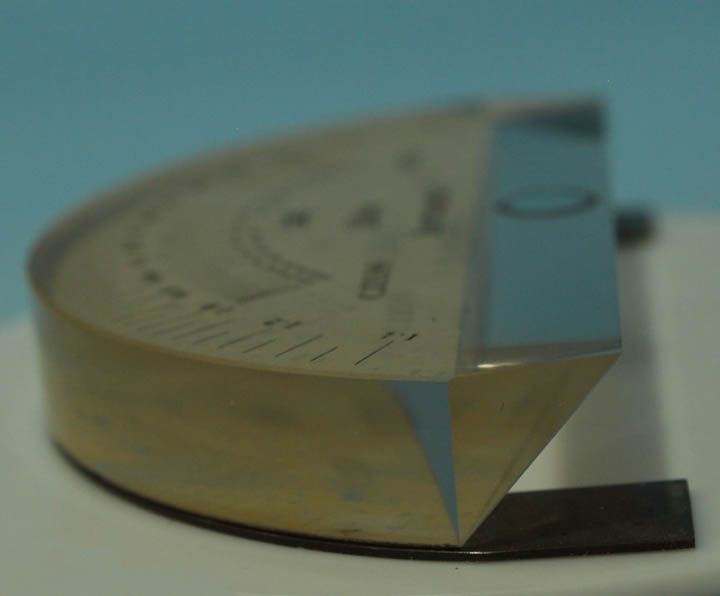
 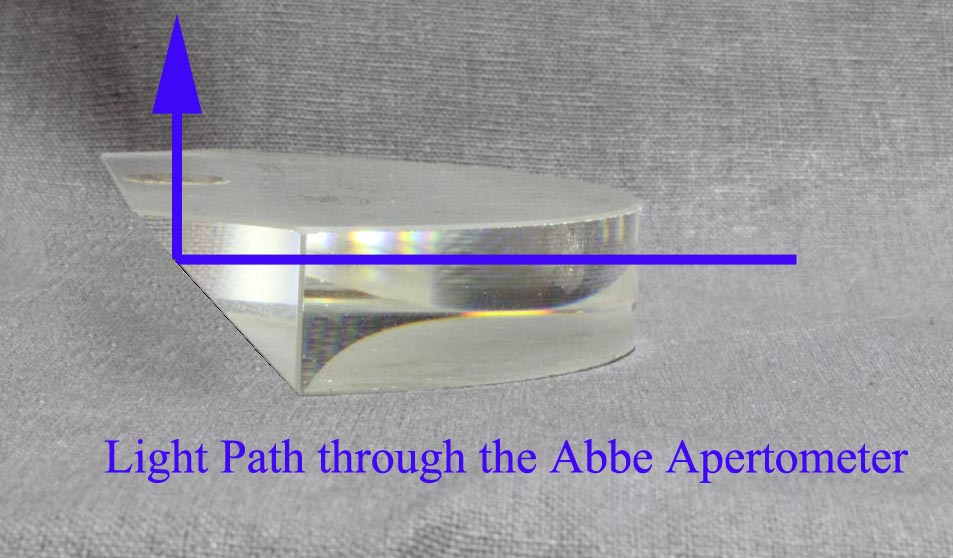 The light path when using the apertometer is shown in the images to the left and above. Light is directed horizontally towards the curved side, and is reflected by the 45 degree angle at the back of the glass upwards through the silvered cover slip disc opening. The light source may need to be repositioned as the black cursors are moved. Using the Abbe apertometer to determine n.a. is usually reasonably accurate, provided instructions for its use are carefully followed. The instructions by Zeiss leave out a few helpful details on improving accuracy mentioned by Spitta and Hartridge. Hartridge goes further to make several suggestions for improving accuracy employing a reversed light path, with the light directed down the optical tube and the NA determined by the pattern of light falling on the front of the apertometer. Several features about Hartridge's method also make it quite tedious. Though accuracy may be slightly improved with Hartridge's method, this is not neccesary for ordinary work. The human eye cannot differentiate a change in resolution with small changes in n.a., and a satisfactory result can be obtained by combining the instructions by Zeiss and the precautions mentioned by Spitta.
 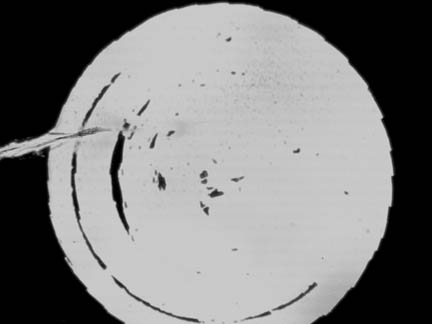 VIEW OF THE HOLE
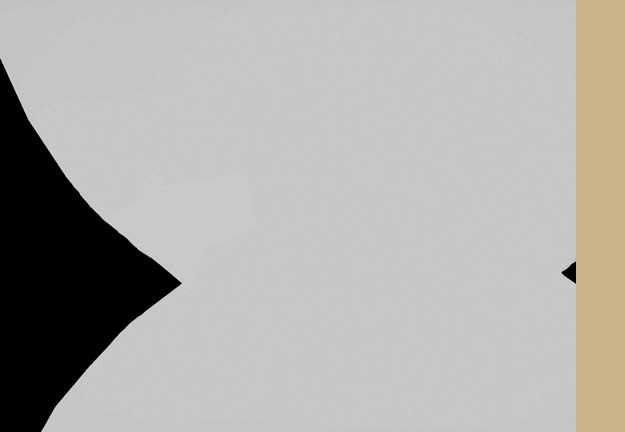 VIEW OF THE CURSORS AS VIEWED THROUGH A PHASE TELESCOPE OR BERTRAND LENS. ON ONE SIDE THE INDICATOR IS PAST THE EDGE OF THE FIELD, THE OTHER INDICATOR HAS JUST ENTERED THE FIELD.
Xon a piece of
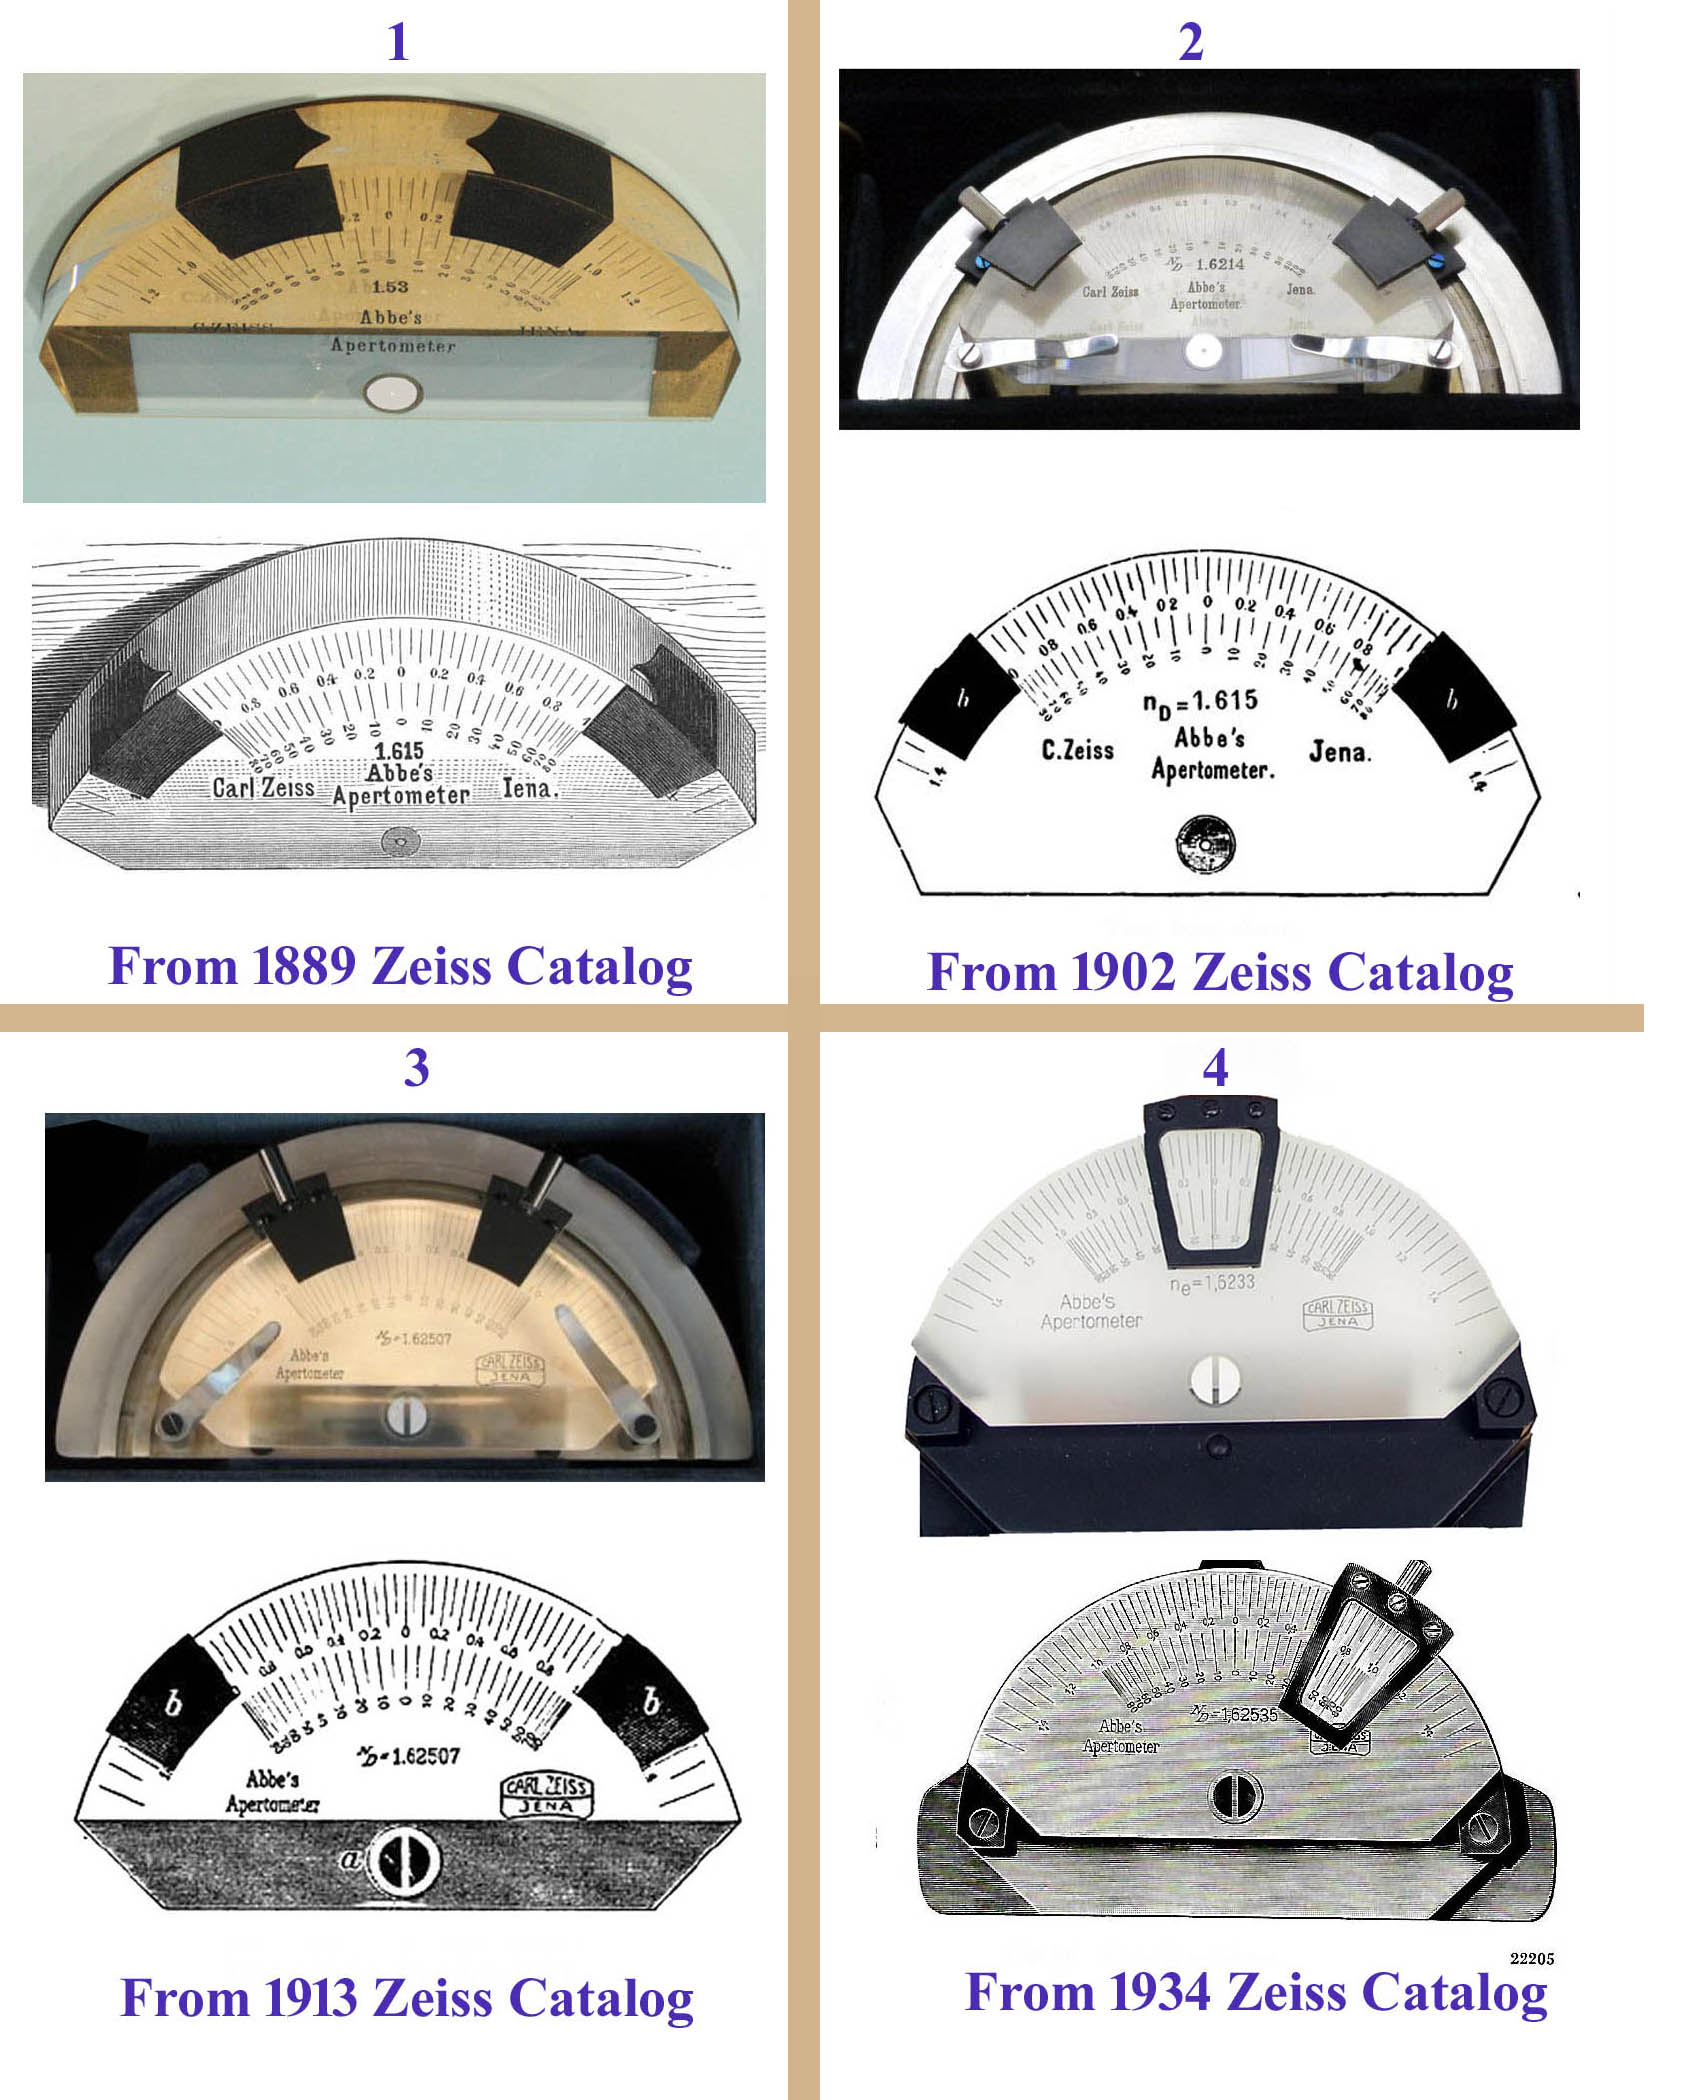
opal glass. I found the cursor type in Zeiss Catalogs starting in 1924. The double indicator type was still offered in the Zeiss catalog of 1913; therefore the change occurred sometime between 1913 and 1924. Spitta's book of 1920 still showed the double indicator type. Unfortunately I have been unable to locate any dated catalog or instruction manual containing an entry for the apertometer after 1913 and before 1924 to further narrow down the search. Since the 1920 edition of Spitta still showed the double indicator version, it is reasonable to conclude the new model with a single cursor was first produced in the 1920's. I would greatly appreciate information from anyone with catalog entries for the Abbe apertometer after 1913 and before 1924 to further narrow this down.